
Laser, Silk Screen, Heat Transfer or Embossing: Choosing a Drinkware Logo Method

Direct answer (55 words): The right drinkware logo method depends on the artwork, substrate, surface finish, color count, product curvature, tactile effect, expected wear, order configuration, and approval criteria. Laser suits precise permanent-looking marks; silk screen suits simpler printed graphics; heat transfer supports more complex color artwork; embossing creates a physical feature but usually requires compatible tooling and geometry.
A logo is not a separate sticker placed at the end of product development. Its result depends on the product surface, pretreatment, coating, curvature, application equipment, artwork, and inspection standard. A method that works on one tumbler may behave differently on another finish or near a seam, taper, handle, or lid feature.
B2B buyers should therefore choose among drinkware logo printing methods by defining the desired result and validating it on the exact product construction. This guide compares four common options supported within Watersy’s customization scope: laser, silk screen, heat transfer, and embossing.[W1]

Quick decision table
| Method | Best starting use | Main strengths | Main constraints to evaluate | Approval focus |
|---|---|---|---|---|
| Laser marking/engraving | Fine, single-tone marks on compatible exposed or coated surfaces | Precise detail; no added ink layer in many applications; controlled positioning | Result varies by substrate and coating; limited color effect; curved zones can distort or defocus | Contrast, edge quality, depth/effect, position, surface change |
| Silk screen printing | One or a few solid colors and relatively simple artwork | Direct color application; practical for bold logos and repeated layouts | Curvature, registration, ink/coating compatibility, fine details and wrap limits | Color, opacity, registration, adhesion, rub resistance |
| Heat transfer | Multicolor or more detailed graphics over a suitable area | Can reproduce complex visual systems and broader decoration | Film/process compatibility, seams, curvature, edge behavior, heat response | Color match, alignment, edge quality, adhesion, wear |
| Embossing/debossing | Tactile or molded/formed brand detail | Integrated physical appearance; no printed color required | Usually affects tooling, geometry, draft, ejection, cleaning and cost | Depth, readability, surface quality, tool ownership and sample approval |
This is a screening tool, not a universal ranking. A buyer should evaluate actual samples using agreed lighting, viewing distance, cleaning, abrasion, and appearance criteria.
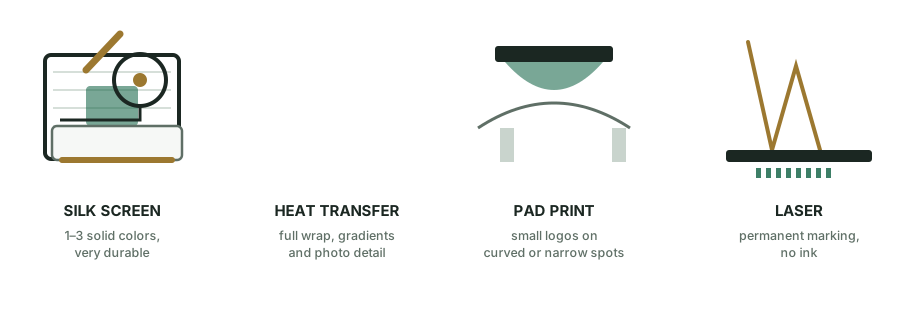
Laser: precision without a multicolor print layer
Laser treatment can create a mark by interacting with a compatible surface or coating. On some coated products, the process removes or changes the coating to reveal contrast. On other substrates, the visible effect may result from a different material response. Buyers should avoid assuming that every “laser logo” has the same color, depth, or durability.
Laser is often worth considering when:
- the logo is single-color or tonal;
- fine text, serial information, or a crisp small mark is required;
- the design benefits from a permanent-looking, understated finish;
- adding a printed ink layer is not the preferred aesthetic;
- personalization or variable data is being evaluated, subject to production planning.
Specify the artwork format, minimum line width, target dimensions, position datum, allowed tonal range, and whether the mark may expose the metal beneath a coating. On a tapered or strongly curved body, a flat artwork file may need adjustment. Near handles, seams, bases, or shoulders, access and focus can become more difficult.
The sample approval should state whether color variation in the substrate or coating is acceptable. “Silver logo” is not precise enough if the laser result changes with the base finish.
Silk screen: strong for simple, bold graphics
Silk screen printing transfers ink through a prepared screen onto the product. It is a practical choice for solid logos, text, and relatively simple graphics when the selected ink system is compatible with the substrate and finish.
It is often a useful starting point when:
- artwork uses one or a small number of spot colors;
- the logo has bold shapes rather than extremely fine gradients;
- the printable area is accessible and not excessively curved;
- brand color and opacity matter;
- repeatable placement can be controlled with fixtures.
The process variables go beyond a Pantone reference. Surface energy, pretreatment, coating texture, ink system, cure conditions, print thickness, and handling all influence the result. Registration becomes more demanding as color count increases. A rough powder-coated surface can visually and physically interact with the ink differently from a smooth finish.
For production approval, define color tolerance, opacity, pinholes, edge sharpness, registration, location, rotation, and acceptable cosmetic limits. If the logo is expected to survive a particular cleaning or abrasion regime, identify that regime and a pass/fail rule rather than asking for “permanent printing.”
ASTM D3359 describes tape-test methods for rating adhesion of relatively ductile coating films on metallic substrates.[1] It may inform a coating or print validation plan when technically applicable, but a buyer must confirm whether the method fits the exact ink, coating, substrate, geometry, and objective. Naming a standard without agreeing the procedure and acceptance level is not enough.
Heat transfer: useful for complex color systems
Heat-transfer decoration uses heat and pressure to transfer a prepared graphic system to a suitable surface. It can be considered for multicolor artwork, gradients, patterns, or larger decorative coverage that would be difficult to reproduce through a simple one-color screen-print operation.
It is not automatically the best choice for every detailed graphic. Evaluate:
- compatibility with the base coating or substrate;
- product taper, curvature, handle interference, and seam location;
- graphic distortion around the body;
- color reproduction and approved reference standard;
- edge visibility, overlap, bubbling, wrinkles, or incomplete transfer;
- effect of the application temperature on the product finish;
- cleaning, abrasion, and intended-use requirements.
A digital mock-up can help position artwork, but it does not prove production color or adhesion. Approve a physical decorated sample on the intended product and finish. For broad coverage, inspect the product from multiple angles rather than only photographing the front logo.
Embossing: the logo becomes part of the structure
Embossing or debossing creates raised or recessed geometry. Depending on the component and manufacturing route, the mark may be molded into a plastic lid or accessory, formed into another part, or created through dedicated tooling features.
This method can suit brands that want a subtle tactile identity, a mark that does not depend on printed color, or branding integrated into a private component. It also creates engineering questions:
- Is the feature on plastic, silicone, metal, or packaging?
- Does the location require new or modified tooling?
- Are draft and ejection affected?
- Can material fill the smallest details?
- Does the mark create residue traps or complicate cleaning?
- Will texture, gloss, and viewing angle keep it readable?
- Who owns the tooling insert or revised mold geometry?
Embossing should be reviewed before tooling approval. Adding it late can trigger tool modification, sample repetition, and documentation changes. The purchase and tooling agreements should clearly identify ownership, use rights, maintenance, storage, and disposition for private features.[W2]
Match the process to the artwork
Start with production artwork rather than a screenshot. Useful files normally include vector paths, outlined or supplied fonts, dimensions, color references, and a visual showing placement on the product.
Ask these questions:
- Is the mark one color, spot color, full color, tonal, or tactile?
- Does it contain gradients, photographs, halftones, fine text, or thin lines?
- Is the desired area flat, cylindrical, tapered, textured, or interrupted?
- Must the decoration cross a seam or wrap around the product?
- What viewing distance and lighting matter at retail or in use?
- Which defects would cause rejection?
Simplifying artwork can improve robustness. A thin reversed line that looks clear on a large monitor may not reproduce consistently on a textured, curved vessel. The supplier should flag risky details before making production screens, films, fixtures, or tooling.
Define durability instead of asking for “the most durable logo”
Durability has multiple meanings: resistance to hand washing, dishwasher cycles, abrasion, chemicals, UV exposure, impact, or contact with packaging. The relevant requirement depends on the product and channel.
Use a test brief that states:
- exact model, finish, and logo method;
- conditioning before testing;
- cleaning solution, temperature, cycle, or rubbing medium;
- number and direction of actions where relevant;
- inspection lighting and viewing distance;
- acceptable fading, lifting, scratching, or edge change;
- whether function and cosmetics are assessed separately.
Do not transfer a result from one finish to all products. Watersy has an internal reference to a 25-cycle powder-coating test, but it applies only to the corresponding tested conditions and cannot support a universal decoration claim.[W3]
A six-step approval workflow
Step 1: Freeze the product surface
Confirm body material, coating or finish, texture, color, curvature, and decoration zone. Logo testing before the surface is stable creates rework.
Step 2: Prepare controlled artwork
Supply vector files, dimensions, spot colors, placement references, and alternative simplified artwork if fine features are near the process limit.
Step 3: Select one or two viable methods
Use the decision table to narrow options. Compare methods on commercial relevance, not only visual preference.
Step 4: Produce physical samples
Review the exact product/finish combination. Label revisions so comments refer to a controlled sample.
Step 5: Agree acceptance criteria
Define color, location, rotation, edge quality, adhesion, wear, and cosmetic limits. Record the test method and conditions if a durability claim is required.
Step 6: Control production changes
Require review when artwork, finish, ink/transfer system, tooling, location, or supplier changes. Retain an approved reference and drawing.
A Watersy manufacturing perspective
Watersy’s integrated workflow includes surface finishing and logo application, alongside stainless-steel body production, lid injection molding, assembly, inspection, and packing.[W4] Laser, silk screen, heat transfer, and embossing are within the confirmed customization scope, with feasibility and order requirements determined by the specific product and process.[W1]
That integrated view helps buyers avoid a common sequence error: approving the vessel, then introducing a logo that conflicts with its finish, geometry, or packaging. The stronger approach is to evaluate product, surface, artwork, method, test requirement, and carton protection together.
RFQ checklist for logo decoration
Include the following with your inquiry:
- product model, capacity, and surface finish;
- target market and channel;
- vector logo file and visual placement reference;
- final logo dimensions and location datum;
- color references and acceptable tolerance;
- preferred method, if already decided;
- required tactile, gloss, or tonal effect;
- cleaning and wear expectations;
- inspection and rejection criteria;
- quantity by color, artwork, and SKU;
- packaging surfaces that may contact the decoration;
- approval owner and required launch date.
There is no universally superior logo process. The best method is the one that produces the intended brand effect on the chosen construction with a controlled, testable production standard. Continue with the Stainless Steel Drinkware Materials and Engineering guide or browse Product Technology & Materials.
Request logo and finish specifications from Watersy by sharing the product, finish, artwork, placement, quantity breakdown, and target durability requirement.
Sources and further reading
Related guides